Transform Your Space: 6 Ways to Light Corridors That Leave an Impression
Corridors are transitional spaces that connect us from room to room, level to level, yet they’re often fitted with a series of basic downlights in the design process. But what if I told you that corridor lighting could be so much more?
After a decade in the lighting industry, I’ve learned that lighting is one of the most powerful design tools available. It has the ability to completely transform a space, change how you feel when you walk through it, and even alter your perception of dimensions and materials. The same hallway can feel narrow and clinical, or open and luxurious, simply by changing the lighting approach.
Let’s explore how designers can move beyond the ordinary.
What Defines Corridor Lighting?
Before we dive into specific techniques, let’s establish what we’re talking about. In North America, a corridor is simply a transitional space that gets you from one room to another. It’s often that narrow piece of real estate that serves a functional purpose but rarely gets the design attention it deserves.
Here’s something fascinating: when designing lighting layouts using IES standards, offices have specific requirements (40-50 footcandles on desks), but corridors? They only need to be bright enough so you don’t fall, typically around 20-30 footcandles. This minimal requirement means corridors present a blank canvas for creative lighting design.
6 Corridor Lighting Techniques to Transform Your Space
- Downlights: The Traditional Approach
- Narrow Spotlight: The Cinematic Approach
- Indirect Cove Lighting: A Personal Favorite
- Direct Cove Lighting: Highlighting Architecture
- Wall Washing: Expanding Visual Space
- Creative Combinations: Where Imagination Meets Illumination

1. Downlights: The Traditional Approach
Let’s talk about the common choice: downlights. They’re everywhere. Walk into any office building, apartment complex, or commercial space, and you’ll find corridors lit exclusively with recessed downlights.
When Downlights Work
Don’t get me wrong; downlights have their place. They create clean, simple illumination patterns with uniform lighting. They’re modern, minimalistic, and for general-purpose hallways with no special requirements, they get the job done.
The Downside of Downlights
The main drawback? Downlights create shadows and can make spaces feel narrower than they actually are. Because the light comes straight down, you get that characteristic shadowing effect on walls, and the space loses dimension. You’re also creating what we at the office have coined “ceiling acne” – lots of visible fixtures dotting the ceiling plane in order to get enough illumination for the space.
If you’re designing a gallery, a luxury hotel, or any space where the corridor serves a purpose beyond simple circulation, downlights alone won’t cut it. They’re functional, but they lack personality.
💡 Our Spec Rec: Liteline, LUNA
For achieving the classic downlight look, I recommend the Liteline LUNA. It’s a product that’s beloved in the industry for good reason – it’s high quality, typically in stock, and delivers that clean, modern aesthetic that designers expect from a recessed downlight.
One of the things I appreciate about LUNA is its flexibility beyond the standard round trim. You can specify it as trimless (what we call “mud in”), where only the reflector is visible and the outer trim disappears into the ceiling plane. This creates an incredibly clean, minimalist look that many high-end projects demand.

LUNA
I also strongly encourage you to explore our interactive line card to see all the configuration options – gimbal options for adjustability, square trims, different finishes including black, even RGB colour-changing options, and specialty versions for wood ceilings.
The possibilities are extensive, and the right choice depends on your specific project requirements and aesthetic goals.
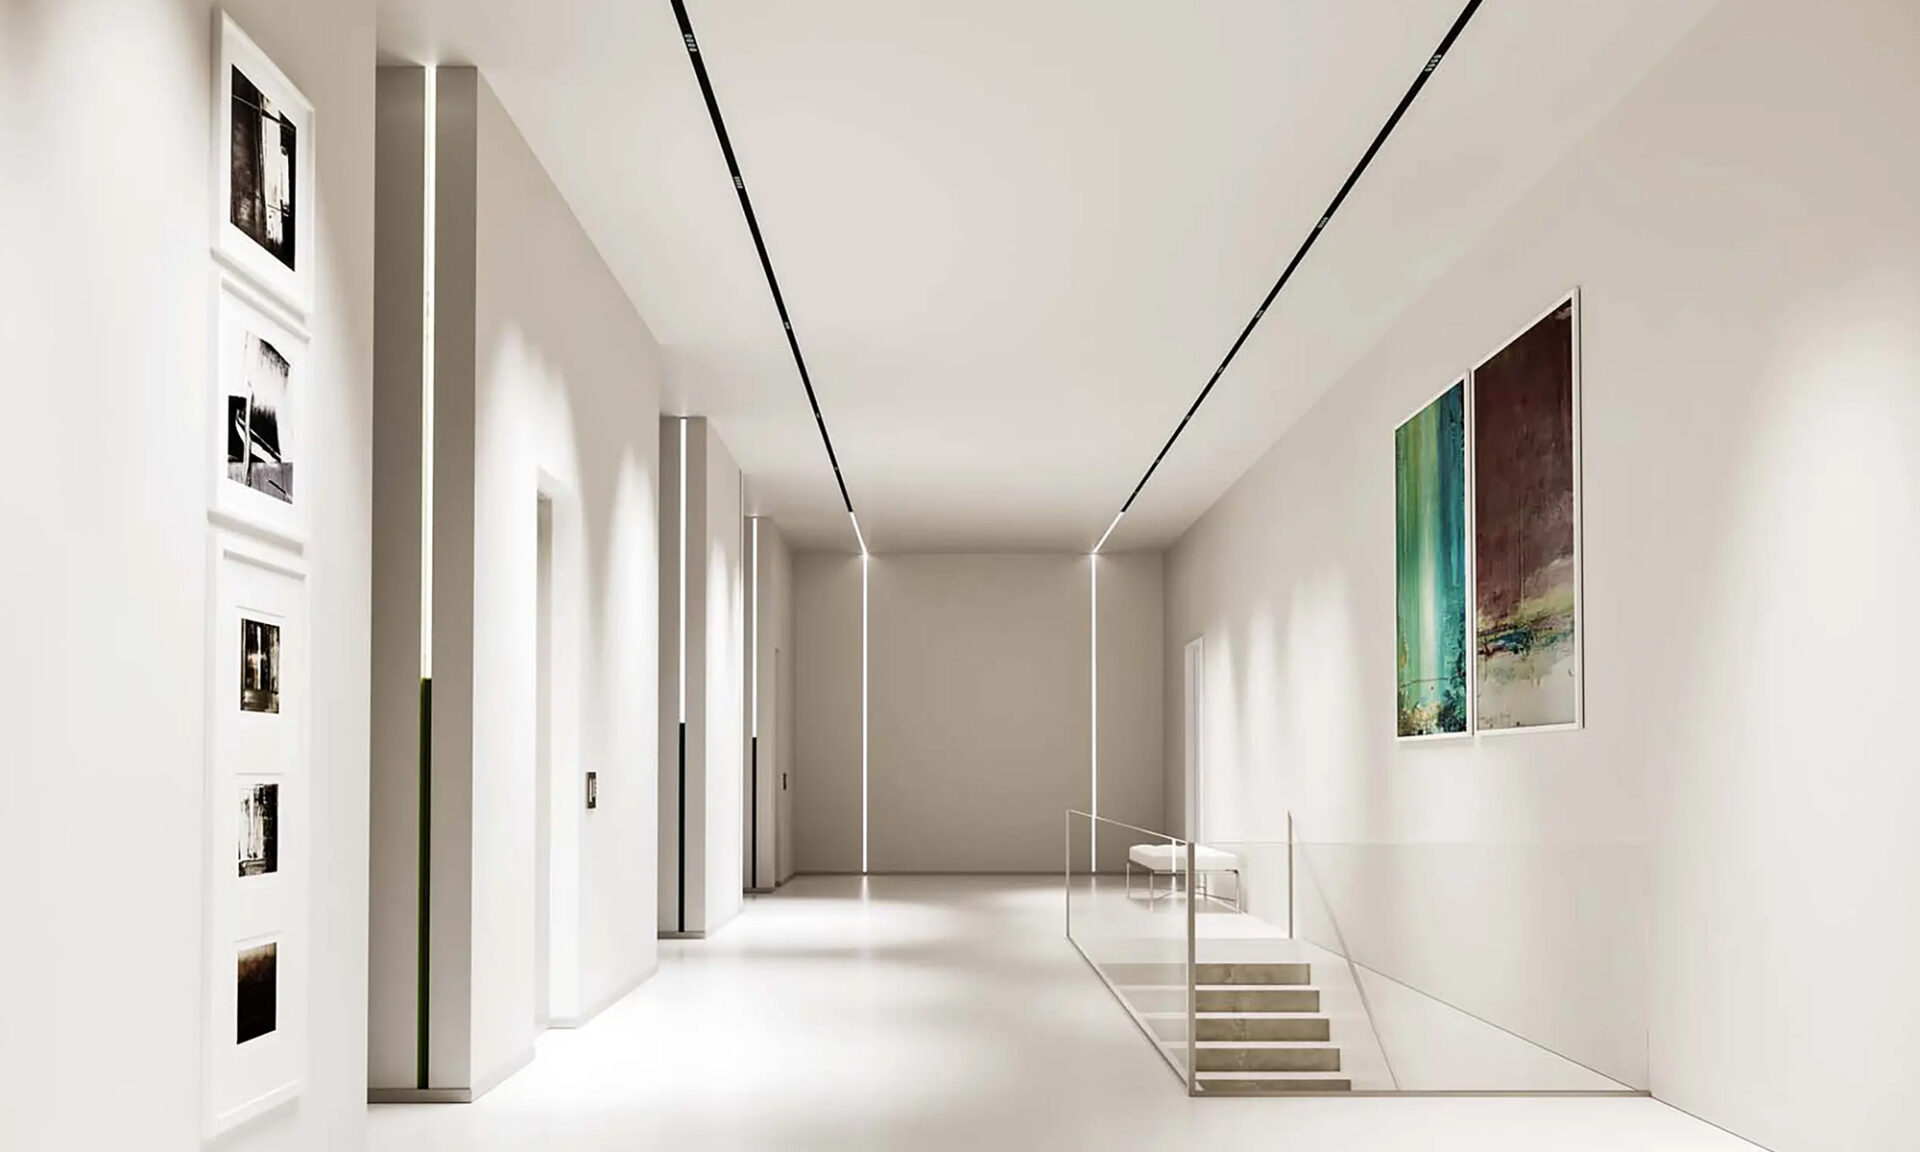
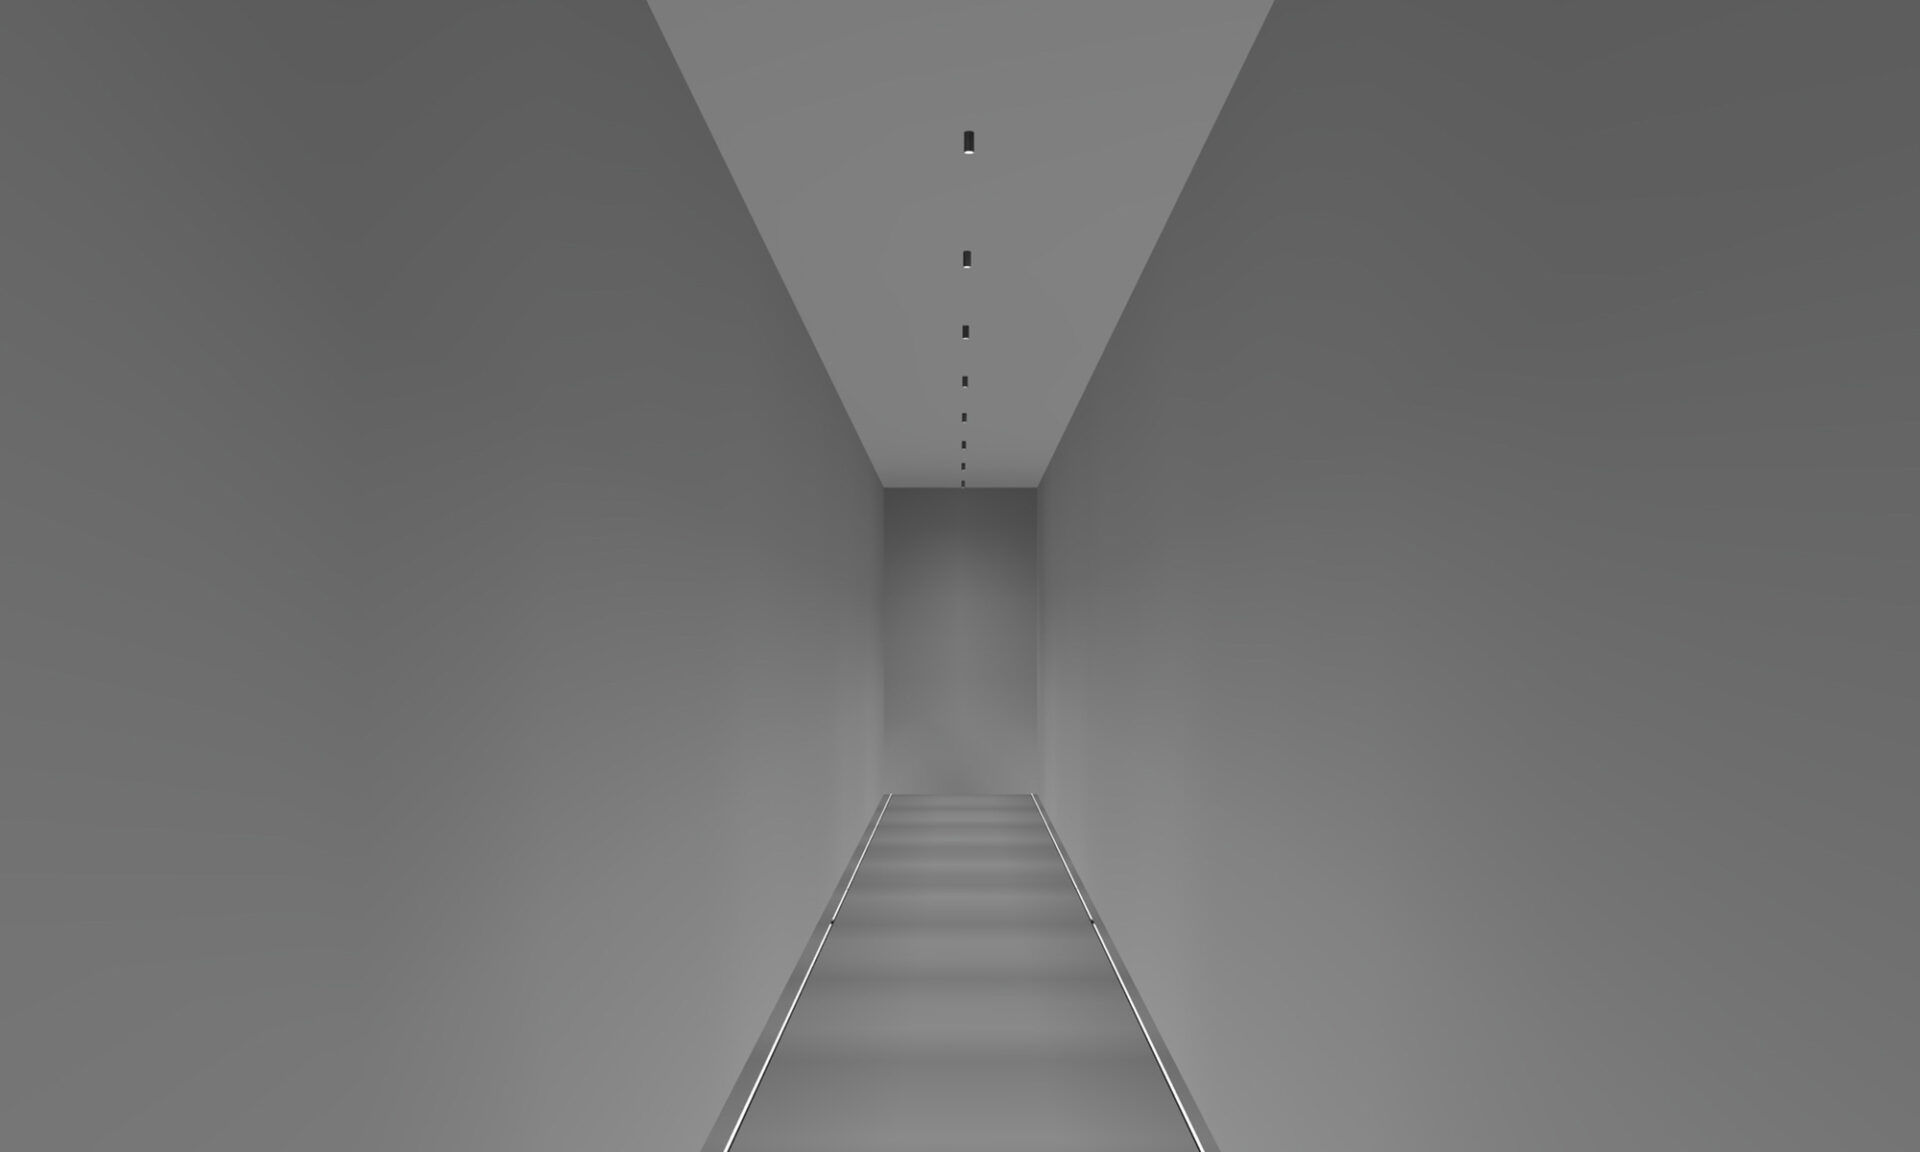
2. Narrow Spotlight: The Cinematic Approach
Best for: Architectural hallways, hotel corridors, clubs, and spaces where you want to create drama.
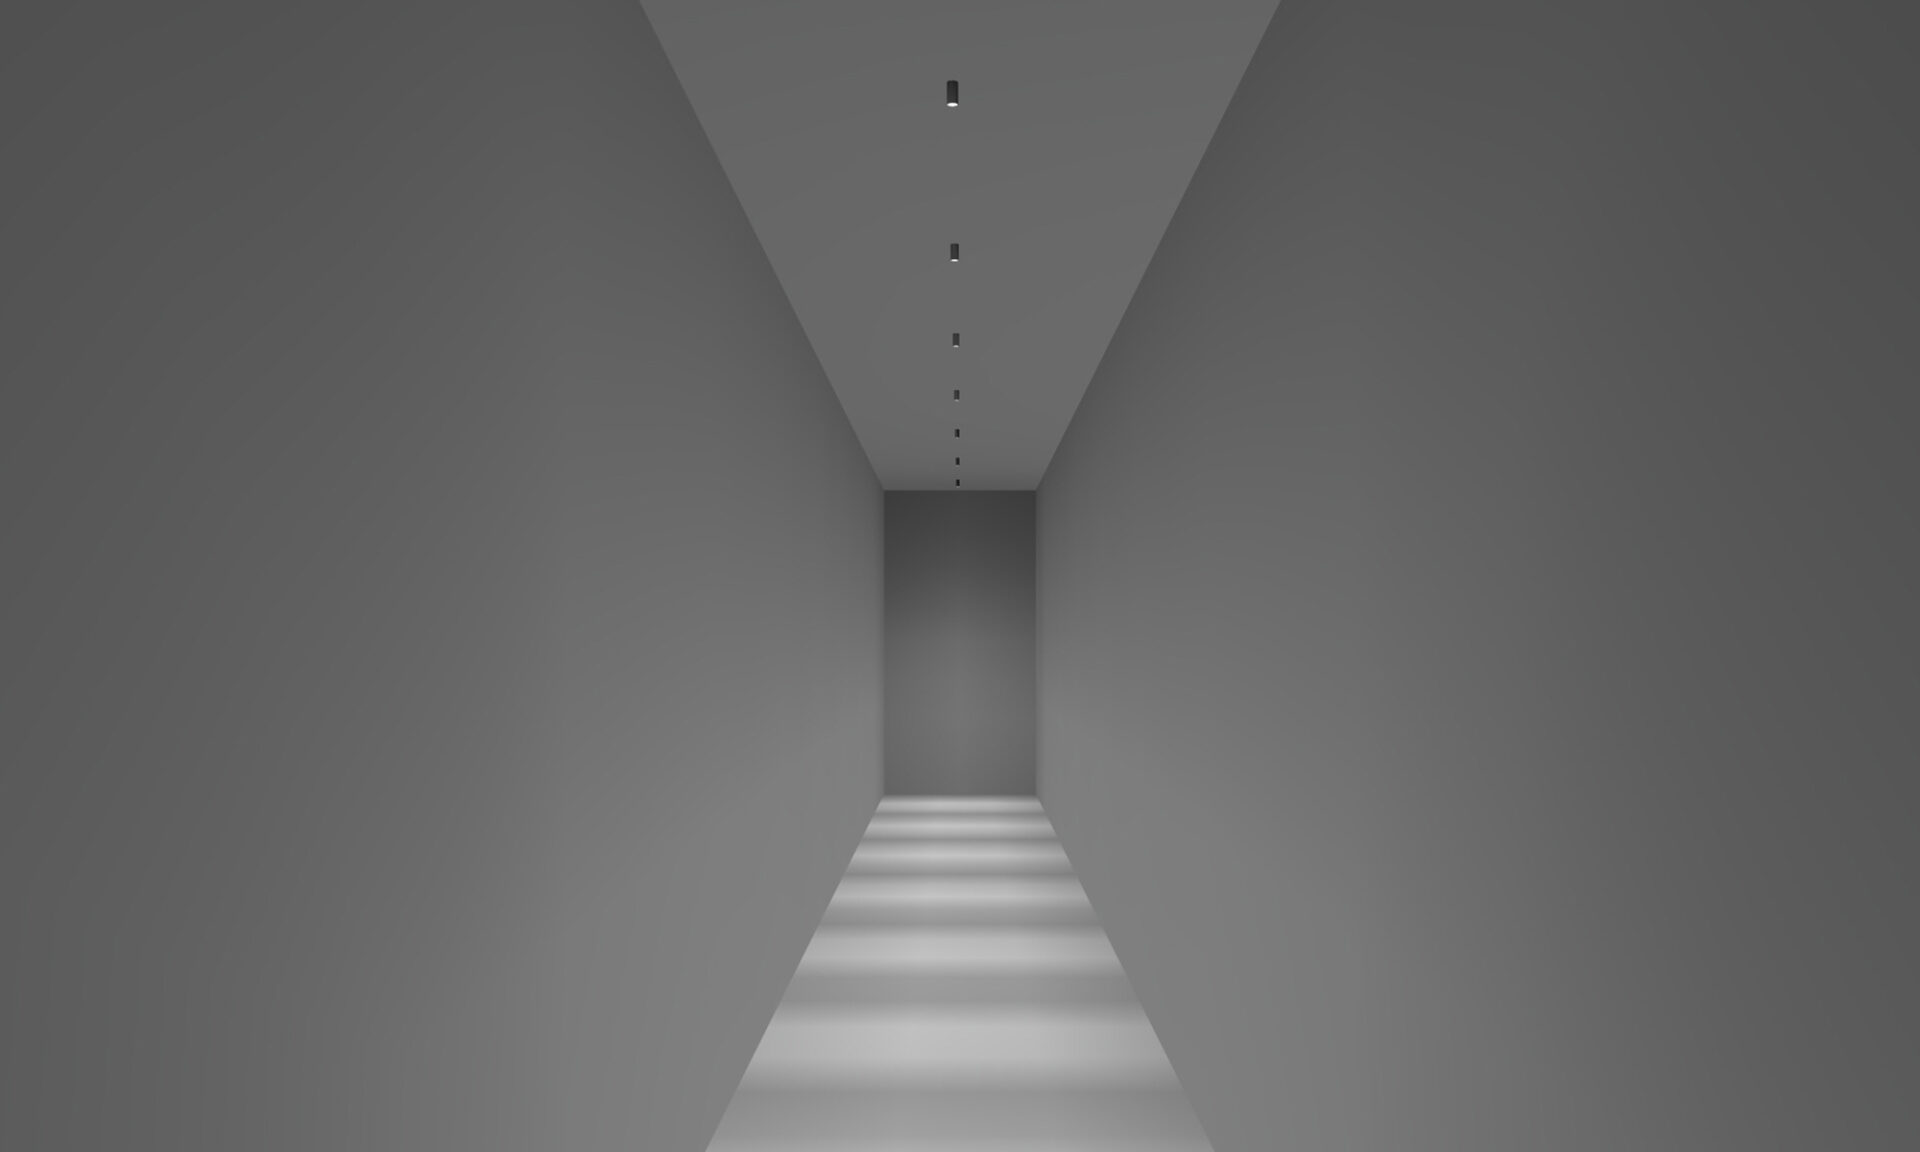
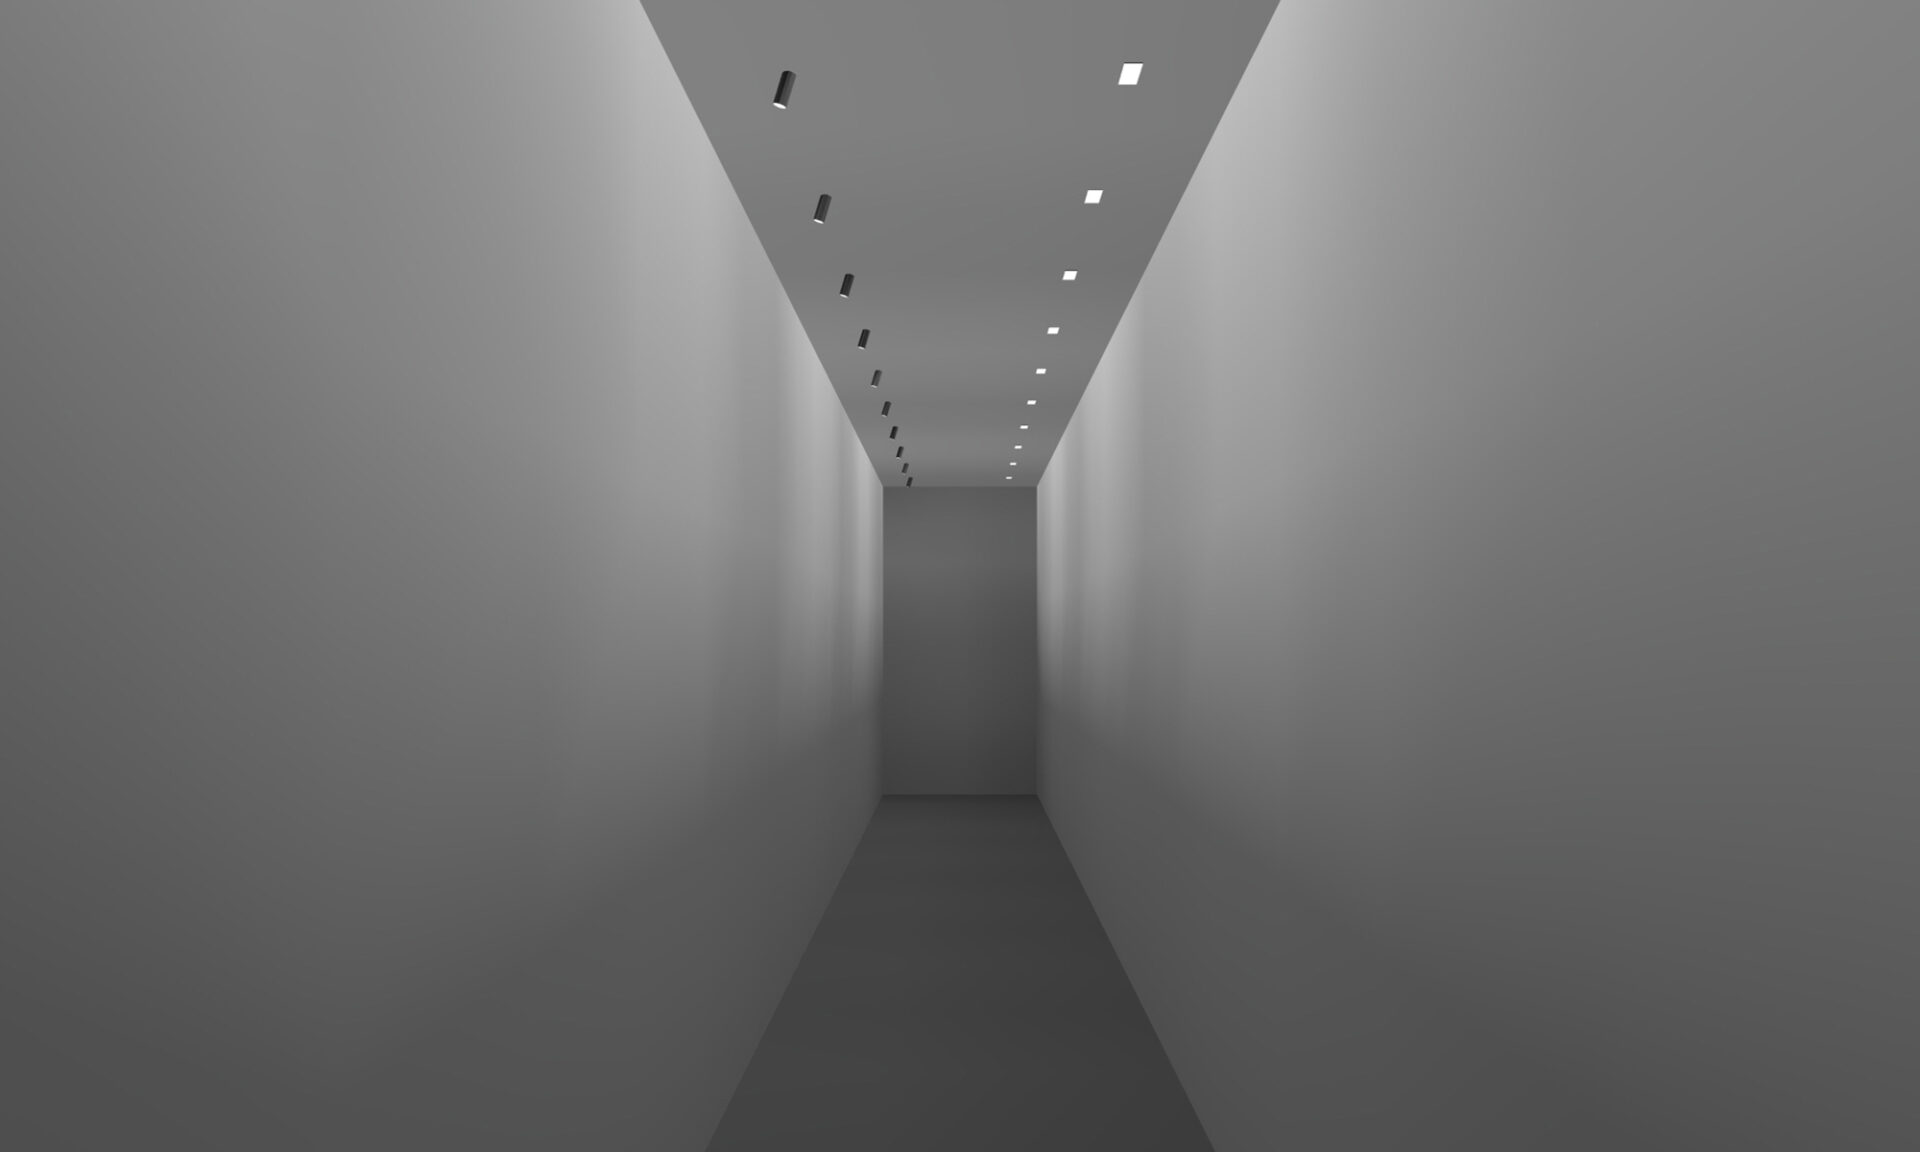
Narrow spotlights create concentrated cones of light that run along the floor, producing a strong contrast that emphasizes depth. The effect is incredibly cinematic, imagine a sci-fi movie where lights activate one after another – thoom-thoom-thoom – and it guides you down a mysterious corridor. Your eye is naturally drawn forward, creating visual direction.
The Atmosphere: Dramatic, sophisticated, and moody. This technique works beautifully when you want to create a sense of journey. Each cone of light becomes a waypoint, pulling you through the space. It’s not about visibility (though you can see perfectly well); it’s about creating an experience.
Technical Consideration: Beam angle is crucial here. You need a tight beam to achieve those concentrated circles of light on the floor. Track lighting gives you flexibility to adjust and aim, while recessed fixtures with narrow beam angles can achieve the same effect with a cleaner ceiling plane.
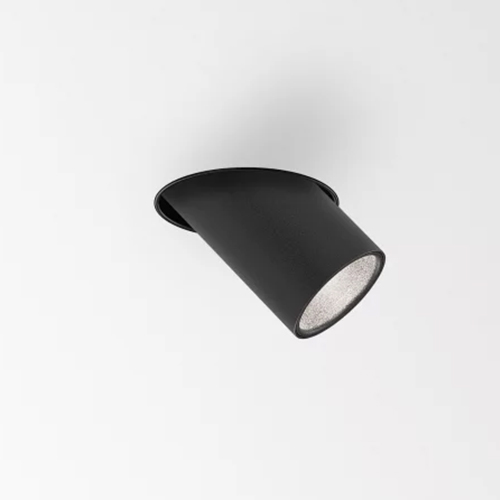
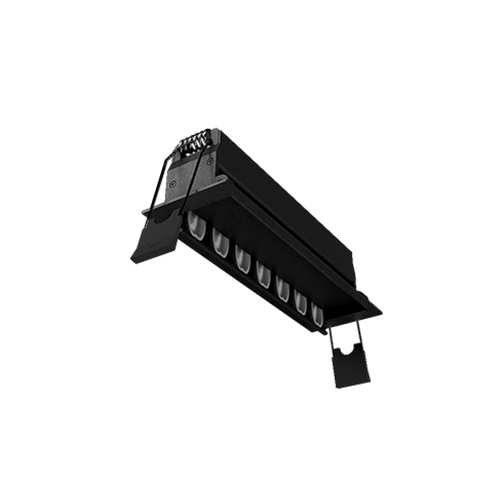
💡 Our Spec Rec: Deltalight, M-SPY 52
For that cinematic narrow spotlight effect, I recommend the Deltalight M-SPY 52. Deltalight is a brand that serious designers should have on their radar—it’s a line that consistently delivers precision optics and thoughtful engineering.
What makes the M-SPY 52 particularly compelling for this application is its tight beam control. You’re getting concentrated pools of light exactly where you want them, with minimal light spill. The result is those striking circles running down your corridor that create visual rhythm and drama.
M-SPY 52
That same M-SPY 52 can also create a refined oval beam. The secret? The linear spread lens accessory. By swapping out the standard lens for this linear spread lens, you transform those concentrated circles into elegant ovals. It’s the exact same base fixture, just a different optical accessory.
This is the kind of flexibility that makes specification easier—you can maintain consistency in your fixture family while achieving different lighting effects.

3. Indirect Cove Lighting: A Personal Favorite
Best for: Hotels, spas, luxury residences, and spaces requiring an elegant, sophisticated feel.
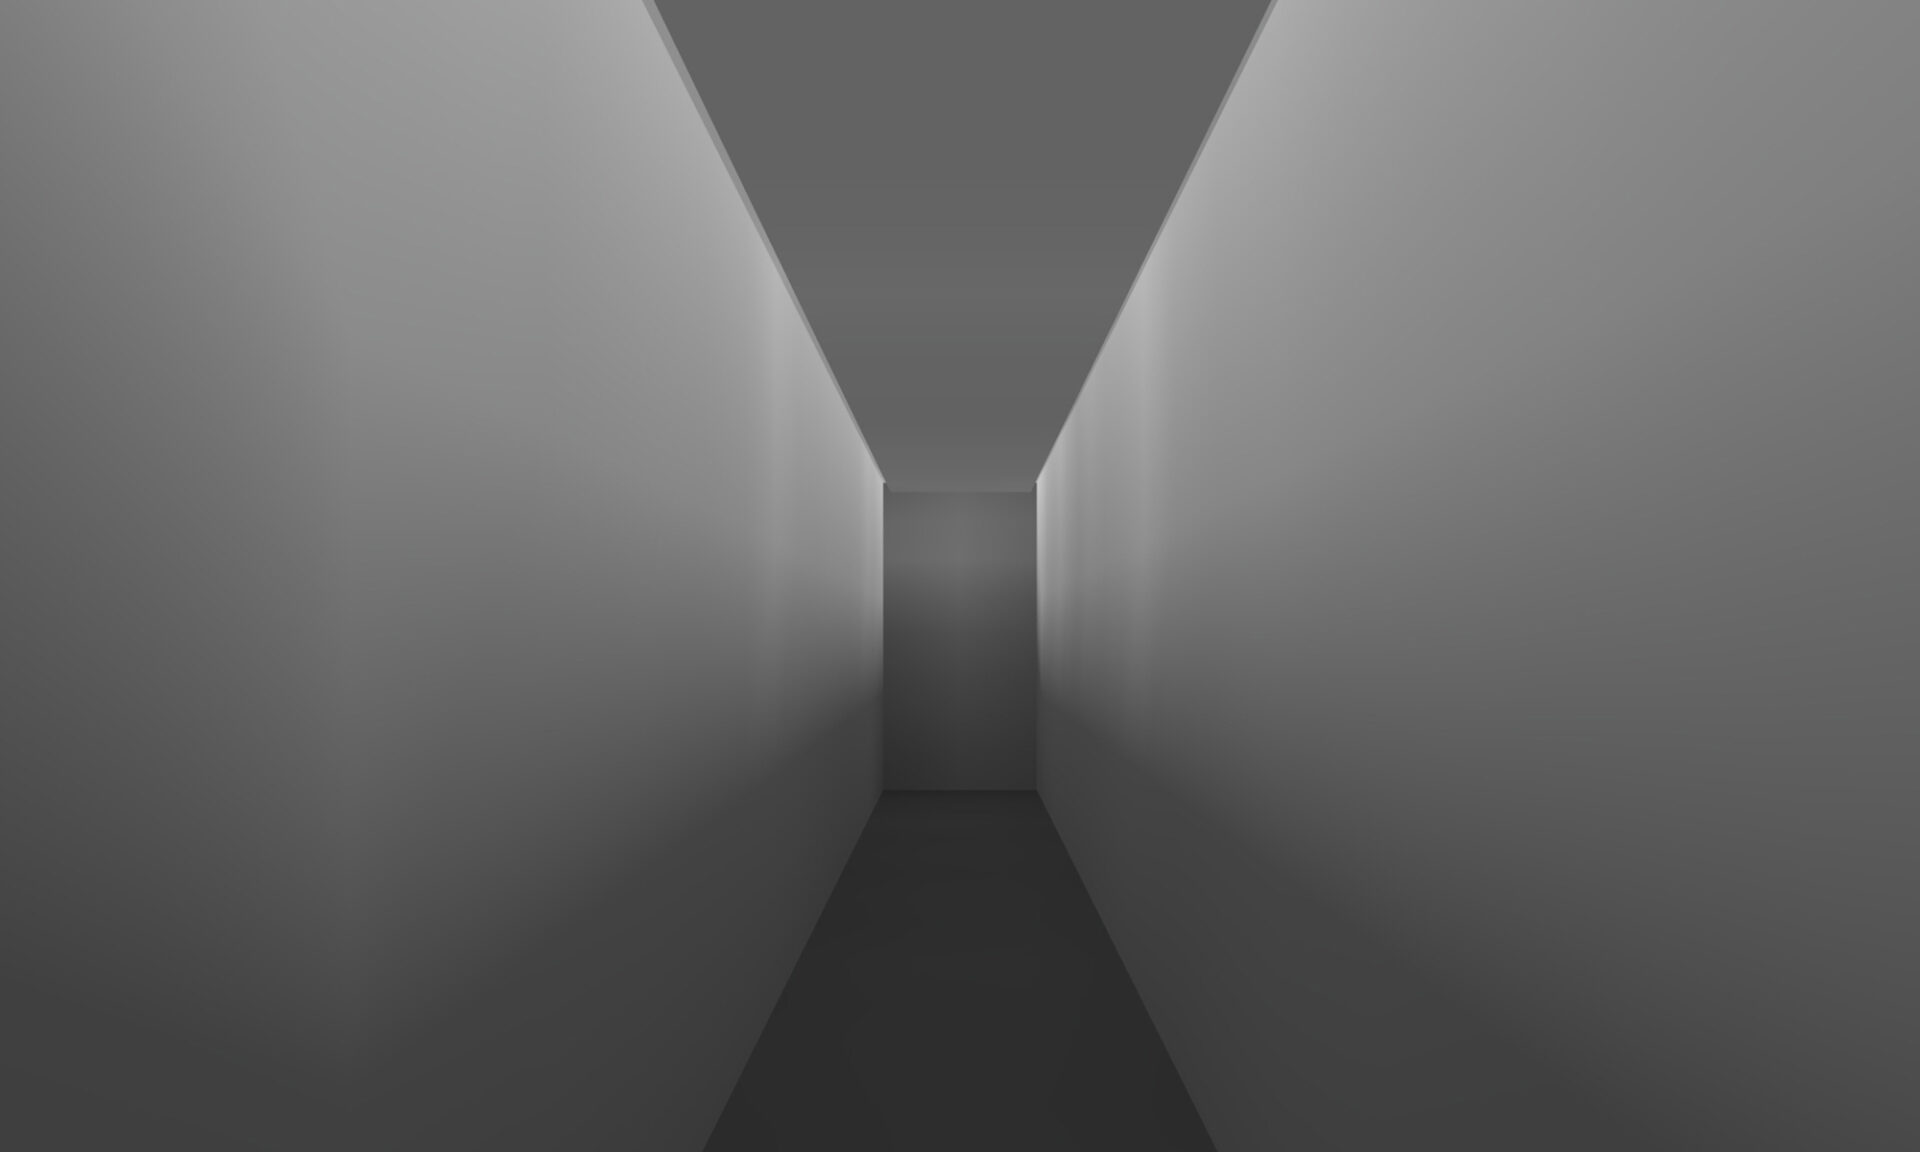
If I could only choose one corridor lighting technique to use everywhere, it would be indirect cove lighting. This approach sends soft light upward toward the ceiling, completely eliminating harsh shadows and glare.
The Atmosphere: Luxurious, open, calming, and ambient.
Here’s what makes indirect cove lighting so special: it actually makes spaces feel taller and more open. By washing the ceiling with light, you’re drawing the eye upward and creating the perception of more volume. The soft, diffused quality feels expensive and intentional.
Technical Insight: Cove lighting refers to any recessed edge where light can be hidden – on the floor, in the wall, or on the ceiling. For indirect cove lighting, we’re specifically talking about concealing the light source and directing it upward. The key is that you never see the light source itself, only its effect.
Technical Flexibility: One question I often get is whether you need to modify the ceiling to achieve this effect. While traditional cove lighting does involve architectural details, there are now profile channels and extrusions with tape light that create the same effect without cutting into your ceiling. These L-shaped profiles hide the light source behind a lip, giving you that coveted indirect glow.
💡 Our Spec Rec: Axis Lighting, Pose
Not every project allows for recessed ceiling details. Maybe you’re working with an existing structure that doesn’t have a drop ceiling and making extensive ceiling modifications is impractical. That’s where surface-mounted alternatives like Axis Lighting, Pose come into play.
Pose is a wall-mounted linear fixture that creates a similar indirect lighting effect without requiring ceiling modifications. Picture a sleek shelf-like profile that mounts along your corridor walls, angled upward. LED sources inside the fixture send light climbing toward the ceiling, creating that soft ambient glow from below rather than from a ceiling reveal.
The effect isn’t identical to true recessed ceiling cove lighting, but the atmospheric quality is remarkably similar. You still get that floating, elevated feeling. The ceiling still glows—and crucially, installation is far simpler since Pose mounts directly to the wall perimeter.
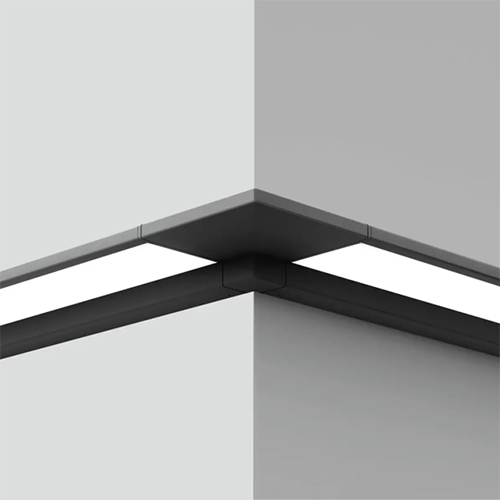
Pose
The rendering we’re showing uses a 4-foot section for visualization, but Pose can be specified in seamless, continuous runs for a polished, uninterrupted appearance.
When you see it installed continuously along both walls of a corridor, the effect is quite elegant – two parallel lines of soft uplight transforming what could be ordinary circulation space into something special.
4. Direct Cove Lighting: Highlighting Architecture
Best for: Spaces with textured walls, artwork displays, or interesting architectural materials.
Unlike indirect cove lighting that sends light upward to wash the ceiling, direct cove lighting works in the opposite way by directing light downward onto walls. This creates stronger visual contrast and is excellent for highlighting wall materials and textures.
The Atmosphere: Pronounced, architectural, and character-rich.
Direct cove lighting gives you definition, it’s perfect when you have decorative panels, stone work, or artwork that deserves attention. The technique adds personality without the spotlight intensity you’d see in a gallery setting.
Design Consideration: Many successful corridor designs combine floor and ceiling cove lighting on opposite walls. This creates beautiful symmetry and prevents one side from feeling too dark. You’re essentially framing the space with light.
💡 Our Spec Rec: Premier Lighting, LD6319 Cove Indirect Lighting Profile
Achieving that luxurious indirect cove lighting effect comes down to one critical principle: hiding the light source completely. You want the glow, not the glare. The Premier Lighting LD6319 profile is engineered specifically for this purpose.
Think of the LD6319 as an architectural channel that gets recessed into your ceiling perimeter. The profile creates a niche where your LED tape sits hidden from view and skirts around the drop ceiling, directing light upward to wash the ceiling plane with soft, diffused illumination. The curved reflector inside the channel bounces and shapes the light, ensuring even distribution without hotspots.
What I appreciate about the Premier solution is how cleanly it integrates into the architecture. The profile is designed to be “mudded in,” meaning your drywall finish conceals the installation hardware. From below, you see a clean edge and that beautiful indirect glow – nothing else.
The reflector geometry matters here. That curved inner surface isn’t just decorative; it’s doing optical work. Depending on the finish you specify – matte white, bright white, even metallic options – you’ll get different light qualities. A matte white finish softens the light and reduces glare. A brighter reflective finish maximizes efficiency but requires more careful tape placement to avoid brightness variation.
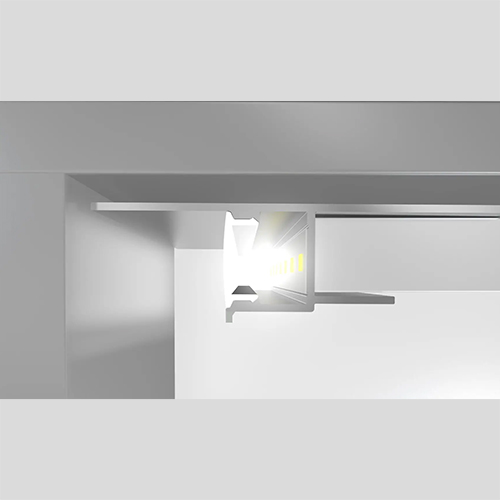
LD6319 Cove Indirect Lighting Profile
Here’s what makes profiles like the LD6319 so versatile: the same channel can be oriented differently for completely different effects.
Mount it horizontally along the ceiling perimeter for that classic floating ceiling look we’ve been discussing. Rotate it and mount it vertically on the wall, facing upward, and you get a floor-level uplight that sends soft illumination climbing toward the ceiling – perfect for creating drama in that exotic, theatrical way.
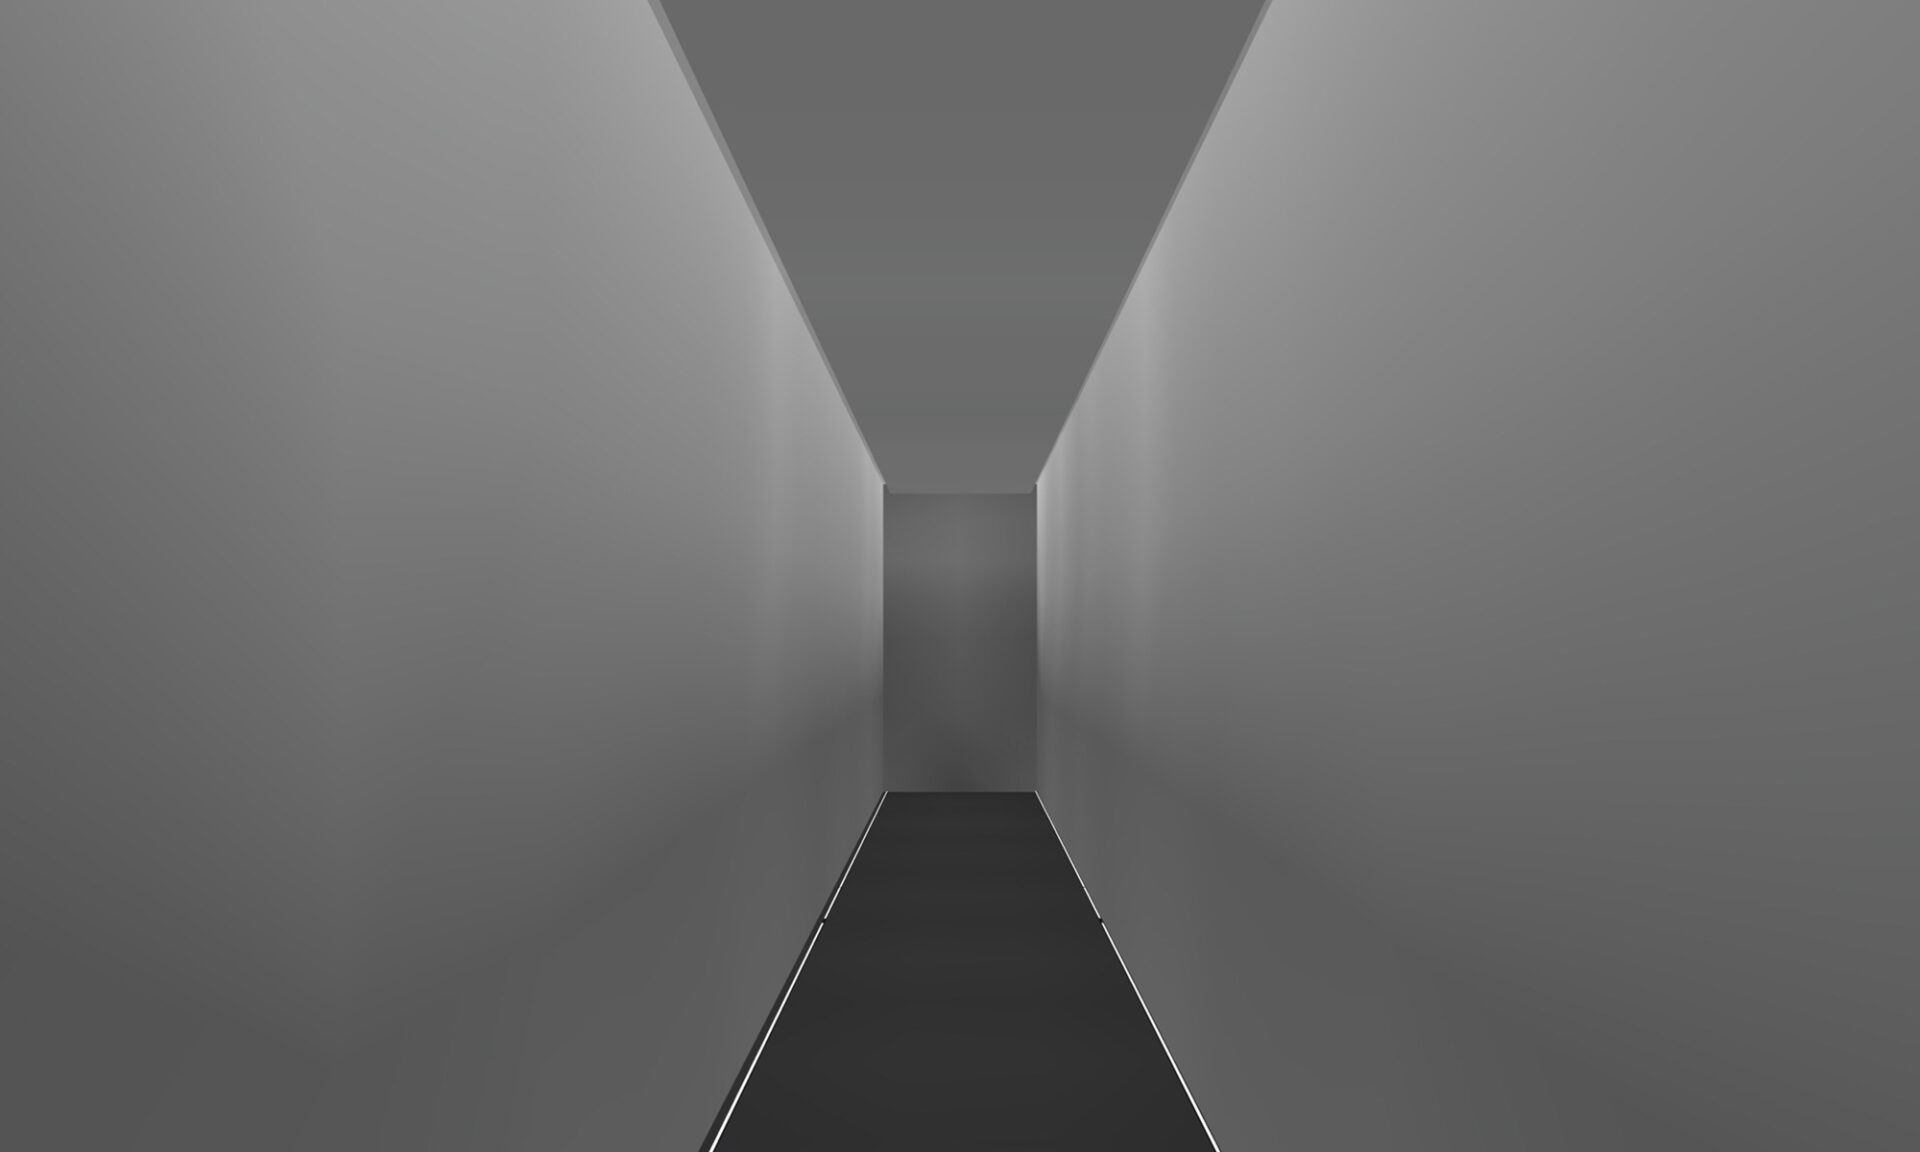
5. Wall Washing: Expanding Visual Space
Best for: Narrow corridors, dim hallways, and spaces that need to feel more expansive.
Wall Washing uses angled lighting to evenly illuminate wall surfaces. Unlike spotlighting, which creates pools of light, wall washing provides uniform coverage across the entire vertical plane.
Think of it like this: wall washing is similar to how picture lights illuminate artwork, except you’re lighting the big picture—the entire wall becomes the canvas. The goal is to make the wall itself the feature, using brightness to reshape how we perceive the corridor’s dimensions.
The Atmosphere: Open, spacious, and bright.
The magic of wall washing lies in how it affects perception. When you evenly light the walls, the brightness on those vertical surfaces makes hallways feel wider and more spacious. Your brain interprets those bright walls as being farther apart than they actually are.
Single vs. Double Wall Washing:
You can wash one wall or both. Double wall washing creates maximum brightness and symmetry, making it ideal for especially narrow or long corridors. Single wall washing might be your choice if one side is glass or windows, or if you want asymmetry in your design.
Product Recommendation: Not all fixtures labeled as “wall wash” are created equal. Look for products that are specifically engineered for uniform distribution. Liteline, for example, makes excellent wall wash fixtures. The key is testing – when you put the fixture into a lighting layout software like AGI or Dialux, you should see uniform coverage, not spots.
Technical Insight: Linear fixtures with multiple cells (small downlights arranged in a linear housing) provide some of the best wall washing results. Because there’s no space between fixtures, you get continuous coverage without shadowing.
💡 Our Spec Rec #1: BL Lighting, Grazelinear [Right on Image]
A recessed linear fixture with wall wash optics gives you that clean, trimless ceiling plane that high-end projects demand. The fixture disappears into the architecture, and you’re left with pure light. The angled reflector inside directs light evenly across the wall surface, creating that uniform wash we’re after.
This approach works beautifully when you have accessible ceiling plenums and want minimal visual interruption.
Grazelinear
From a specification standpoint, products from BL Lighting offer excellent wall wash optics in recessed linear configurations with the precision engineering needed for uniform distribution.
💡 Our Spec Rec #2: USAI Lighting, Wall Wash CLRW4-HO RM [Left on Image]
The alternative is a surface-mounted or track-mounted fixture with wall wash beam angles. These sit on the ceiling surface rather than recessing into it. The optical performance is essentially identical to the recessed option—you’re getting the same angled beam that sweeps evenly down the wall.
Why choose this route? Sometimes ceiling conditions don’t allow for recessed installation. Other times, the exposed fixture becomes part of the design language, especially in industrial or contemporary spaces where the lighting itself is celebrated rather than hidden.
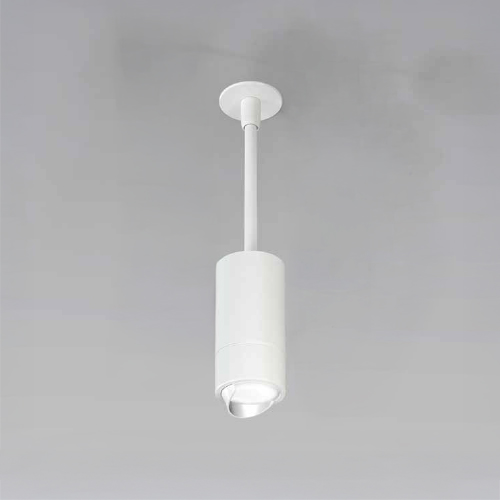
LittleTwos Wall Wash Cylinder
Cylinders like the USAI Lighting, LittleTwos offer a sleek surface-mounted solution. With the wall wash optic specified, they deliver the same uniform coverage without any ceiling recess required.
Recessed vs. Surface-Mounted: Same Result, Different Approach
Here’s something fascinating about wall washing: you can achieve virtually identical results with completely different fixture types. I tested two approaches side by side using the same light output (1000K for each), and the wall washing effect was remarkably similar—same even coverage, same shadowing patterns, same visual result.
The beauty of having multiple product pathways to the same effect is flexibility. You’re not locked into one installation method or architectural requirement to achieved the desired effect. Both approaches deliver that expansive, bright feeling that makes corridors feel wider and more welcoming.
When you’re testing in lighting software, look for uniform footcandle readings across the vertical wall surface. That’s your indicator of proper wall wash performance, regardless of which fixture type you choose. The beam angle typically ranges from 18 to 20 degrees for corridor applications—narrow enough to reach the full wall height without excessive spill, wide enough to create even coverage.
6. Creative Combinations: Where Imagination Meets Illumination
Best for: High-end hotels, architectural projects, luxury interiors, and anyone ready to push boundaries.
This is where corridor lighting gets truly exciting. Why choose just one technique when you can layer multiple approaches to create something extraordinary? The most memorable corridors I’ve seen combine lighting methods in ways that are unexpected and entirely unique.
Some Favourite Combinations:
- Pairing indirect cove lighting with accent spots gives you that soft, luxurious ambiance while still showcasing artwork or architectural features. Think of it as ambient comfort with intentional focal points.
- Floor-level uplights combined with ceiling spotlights create that dramatic runway effect you see in upscale clubs and theatres. The uplight produces a beautiful linear glow up the wall, the overhead spots provide functional illumination, and together they create something exotic and sophisticated. The light itself becomes visual interest.
- Wall washing mixed with narrow spotlights expands the perceived width of your corridor while punctuating the journey with moments of drama. You get the spacious feeling from even wall brightness, plus those striking beams that draw the eye forward along the middle of the hallway.
Design Consideration: These aren’t techniques you’ll find in a handbook. They emerge from conversations with your lighting designer, where you talk about feeling and atmosphere and vision. The creative possibilities are genuinely endless. But achieving polished results requires precision in beam angles, fixture placement, and light control.
When to Use It: Choose combinations when you want people to remember the space. This approach shines in premium residential projects, boutique hotels, corporate headquarters, high-end retail, galleries, or anywhere the corridor is more than just circulation. If you have the budget and want to make a statement, this is your moment.
The Unexpected Addition: In-Ground Uplighting
Looking back at the five lighting combinations we’ve explored, there’s one more layer you can add to create truly distinctive corridor experiences: in-ground uplighting. While these fixtures won’t contribute significantly to your ambient light levels, they absolutely transform the atmosphere—adding drama, visual interest, and that unexpected element that makes people pause and notice.
Here’s something exciting about in-ground lighting: you’re not limited to straight linear paths. Some fixtures can create winding patterns, like the LNR9060S from BL Lighting, that flow organically through the space, even transitioning seamlessly from floor to wall in one continuous line of light. It’s lighting as wayfinding, as art, as journey.

💡 Our Spec Rec: Wall Washing + In-Ground Up Lighting
This combination showcases an asymmetrical lighting approach—two distinct techniques divided across the space, each dominant on its own side. Wall wash on the left, in-ground uplighting on the bottom right. Rather than creating balance through symmetry, this split creates visual interest through intentional contrast.
The wall wash evenly illuminates the left vertical surface, making it ideal for displaying focal elements. Picture the Mac’s II Agencies logo as the focal piece—the wall wash ensures it’s properly highlighted and becomes an immediate focal point. Because the wall is painted blue, you’ll notice how the light bounces and reflects, creating subtle interplay between the two lighting sources.
Meanwhile, the in-ground fixture on the bottom right adds a completely different dimension. Its upward beam creates visual drama at floor level, guiding the eye down the hallway and adding architectural depth. You’re not just lighting a corridor; you’re creating a dynamic visual experience where two lighting techniques work independently yet harmoniously, each claiming its territory to highlight different aspects of the space.
BL InGround
In-ground fixtures sit directly in the path of foot traffic—high heels, rolling luggage, and cleaning equipment all pass over them. That’s why they must be walk-over rated. A cracked fixture creates both a safety hazard and a maintenance headache.
The BL InGround fixture is engineered for this application, delivering that dramatic upward beam while meeting the durability standards required for corridor installations. Always specify walk-over rated fixtures where people will step on them—it’s essential.

Beyond the Six: Other Corridor Lighting Possibilities
The techniques we’ve covered don’t represent the full universe of corridor lighting design.
The key insight is that there’s no single “correct” way to light a corridor. The question isn’t “What’s the standard?” but rather “What do you want to feel?“
Lighting directly impacts experience through emotion and that in turn leaves an impression and lasting memory. A corridor in a spa should feel completely different from one in a contemporary office.
What if lighting didn’t show up on the last page of the specification? What if collaborating with a lighting expert happened early in the design process, when big decisions about materials and mood are being made?
When that happens, something magical occurs. The textures, colours, and accents you’ve so carefully curated for the environment get highlighted and supported through intentional lighting design. But here’s what makes it even more exciting: lighting doesn’t just support your design decisions – it becomes a decorative element in its own right.
Those angled beams cutting through space? The patterns of light and shadow dancing across your walls? The linear glow climbing upward from the floor? That’s lighting as art, as architecture, as experience. It’s not just illumination; it’s an integral part of the design story you’re telling.
We can help you achieve the feeling you want within your constraints. By consulting with us, our lighting design team can render different options to show how the lighting will function and feel in your specific environment (beyond corridors too). Keep in mind that while renderings give you a clear sense of the approach, they never capture exactly how lighting will look in reality—they’re meant to help you understand whether the design works for your space.
Every Space has a Story, and Lighting is How You Tell It.
Whether you’re an interior designer working on your next project, an architect looking for a lighting collaborator, or a property developer who wants to create memorable spaces, we’d love to hear from you.
At Mac’s II Agencies, we can help you explore product options for any of these techniques, create lighting layouts to visualize results, and specify fixtures that achieve your design goals.
Corridors don’t have to be boring. Reach out to discuss your project and discover how the right lighting approach can make all the difference.
About the Author
Mara Honarbin is a Lighting Designer and Specification Writer at Mac’s II Agencies. Her journey into lighting started with a receptionist job at a lighting showroom where, surrounded by beautiful fixtures and learning how light affects space, something spark’d and a passion developed.
Over the past decade at Mac’s II Agencies, Mara has grown from coordinator to lighting designer to specification writer, supported by courses, mentorship, and a team that believes in the transformative power of lighting. What she’s learned is this: lighting is inherently visual. You can talk about beam angles and colour rendering all day, but show someone two versions of the same space with different lighting, and understanding clicks immediately.
For Mara, every space has a story, and lighting is how you tell it.